Shadow Puppets
- Eileen Pottinger

- Apr 10, 2020
- 3 min read
I've wanted to tinker with shadow puppets for a while now, and it is a great maker activity because it contains some technique, some engineering design, a necessary attention to materiality, and lots of scope for the imagination. Additionally, the supplies are almost certainly household items, and mostly recycled.
Even better, shadow puppets are culturally relevant: in Indonesia shadow puppets have been developed into an art form (thanks to Ms. Fattorini for bringing this to my attention!). The photo below, taken by Ivetta Inaray and shared on Flickr, is an example of the ornate forms in Indonesian shadow puppets. If you would like to learn more about Indonesian shadow puppets, check here.

In this post, I'm going to show you how you can make a shadow puppet theater, a simple puppet, and a more complex puppet.
First, a shadow puppet theater is simply a translucent screen stretched between a standing frame. Translucent means that light passes through it but not completely, such that you can't see through it clearly. You probably have translucent material in your house right now: examples are cereal box liners (make sure the cereal is already eaten!), wax paper, and parchment paper. I used parchment paper for my example.

I made my frame from cardboard. Since it is hard to cut a hole into cardboard, I cut two c-shaped pieces and attached them to each other. The cardboard needs to be at least 1" wide so that it is strong enough to hold the paper. The opening of the cardboard needs to be 1/2" smaller than the size of the paper. My paper is 7-1/2" by 5-1/2" and my cardboard frame opening is 6-3/4" by 4-3/4".

I taped the frame together on both sides, so it is a little wobbly but strong enough for these purposes. Then I taped the paper on to it, keeping it as flat as possible.

In order to stand it up, I made a base out of a new piece of cardboard. I scored it 2" from the sides, and slotted it 2" from the ends. For help with scoring and slotting, check out my posts here for scoring and here for slotting.

I could have slotted the frame too, but I thought it would be useful to have a gap between it and the base (and it was!).

For the puppets themselves, I made a simple version and a slightly more complicated version. I recommend starting with the simple version because it is still challenging. Then if you want you can try the complicated version.
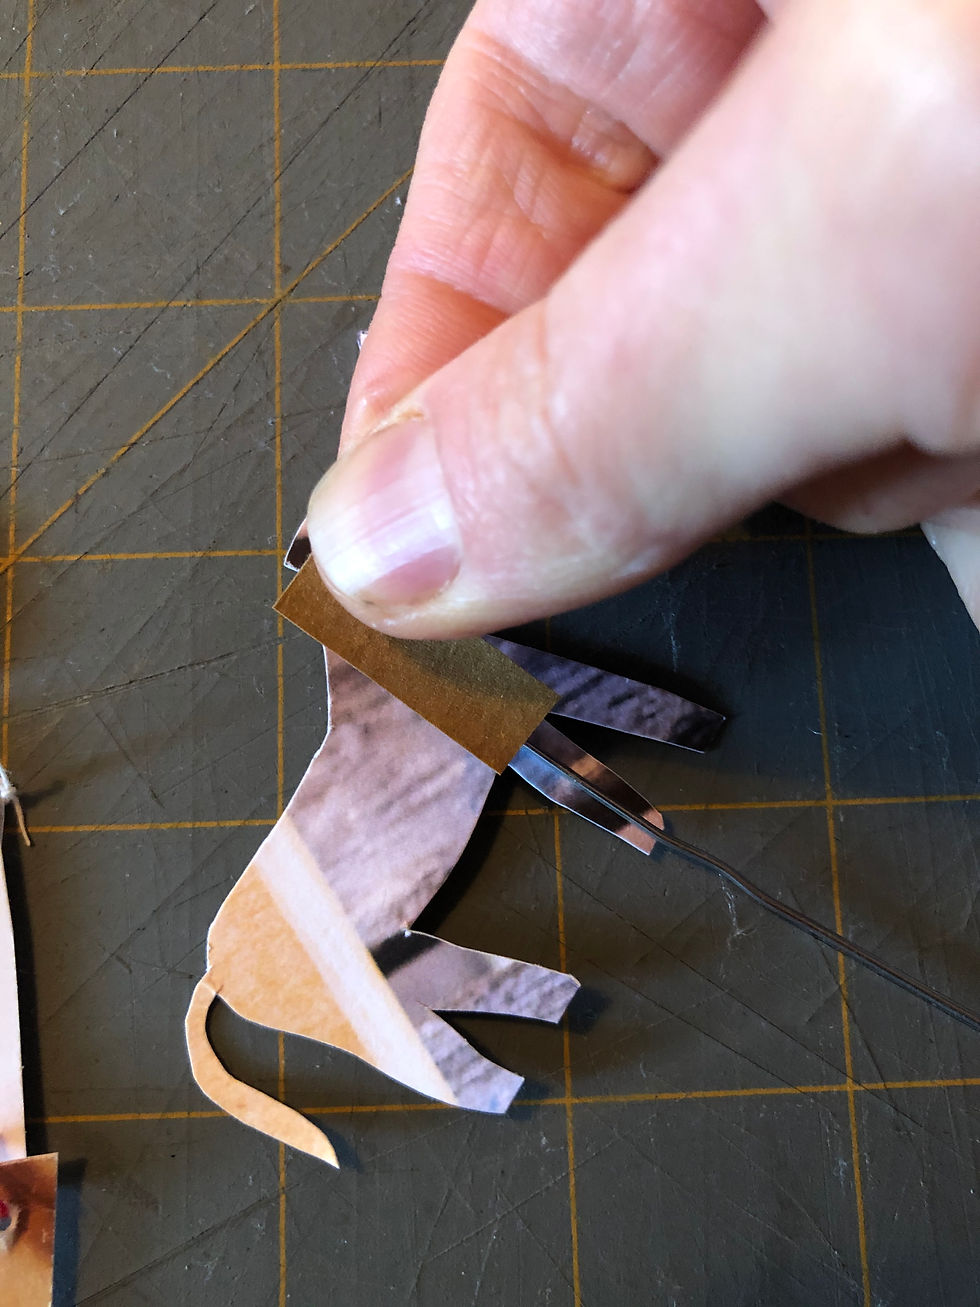
For the simple version, I drew a dog shape on a piece of junk mail and cut it out.

Then I taped a straightened out paper clip to one if the dog's legs:

By holding the paper clip against the screen with a light behind it, I make a shadow! To get the best shadow, you will need a strong directional light behind it. We used my husband's desk lamp, but a flashlight would work too. I tried a bright window and it did not work, but it was a cloudy day so the light might have been too diffuse. I will try again on a sunny day.

In order to put on a mini performance, two characters are needed. You could make another simple one, or you can try for a complicated one. I decided to make a person. I cut out simple shapes for the body, head, arms and legs. I poked holes at the connection points using a pin. I widened the holes with a toothpick.


I decided to keep the head stationary, so I glued it on to the body. I connected the arms and legs with bits of string and attached straightened out paper clips to the arms, like I did with the dog.


In order to put on a play, my son and I worked the puppets together, and we adjusted the bend of the paper clips to make them work with the screen.

The back looks like this:

Once we were done with that, we did a little puppet improv! Enjoy!


Comments